Orchid pot v2.0 had some slight problems, but I am sure the next one will be easier still.
After talking about my first attempt in the comments of the last post, I came up with a few new ideas.
Just assume I fixed the five problems I found the first time; now we have new complications!
I found a new outer pot to work with my already-perfectly-sized inner pot. It is a fully glazed, smooth, no-hole-in-the-bottom useless as fuck decorative pot. I love the colour, but I never use pots with no drainage holes; they are the best way to kill any plant.
I made my concrete in measured batches. Two small ones with the same measure of water to mix. I did have to make a third batch as I was still underestimating how much I needed, but this time the mix in all three were actually measured and not eyeballed.
I taped up my corks (shaved down, a full size cork would let all the growing medium run right out the holes). I hot glued them to the tape on my perfect size interior pot, so it can be used again.

Those corks need to be smaller still!

Here we go! I think I forgot to mention I used veggie oil last time to make pot separation easier. I used a lot more this time, as I didn’t want to destroy that lovely useless pot. I know, I know: I hoard. But this is why! I found a use for a useless thing! It takes me being unable to go to work and to be bored to finally use my useless crap.
You can see the oil at the surface here, and the concrete is still wet. A worry. The next day it was so bad I dipped a paper towel in it to soak up the excess oil.

Weighed down. I brought it inside later, before it got chilly out.

Inside pot pulled out with help of pliers. There was a very thin sheen of ‘crete at the bottom, but it easily chipped off. The inside pot, between the corks pulled up most of the bottom. Not all the way, and no cracking at the bottom. I did it perhaps a bit too soon. Or maybe the corks were too big as I already said. In any case the bottom is thin.
Next problem was how to get the concrete out of the lavender pot. I’ve already given a spoiler with the two pictures above that proves I did it. How? I ran the sink full of hot water and let it soak. I made sure not to get the ‘crete wet, and after 10 minutes I turned it upside down, gave it a couple of thumps with my hand and heard a welcome clunk when it fell out. Whew! Thermodynamics, baby!

Pretty damn clean in there! Yay! The little bits left washed out easily.
My timeline is all screwy now, sorry!

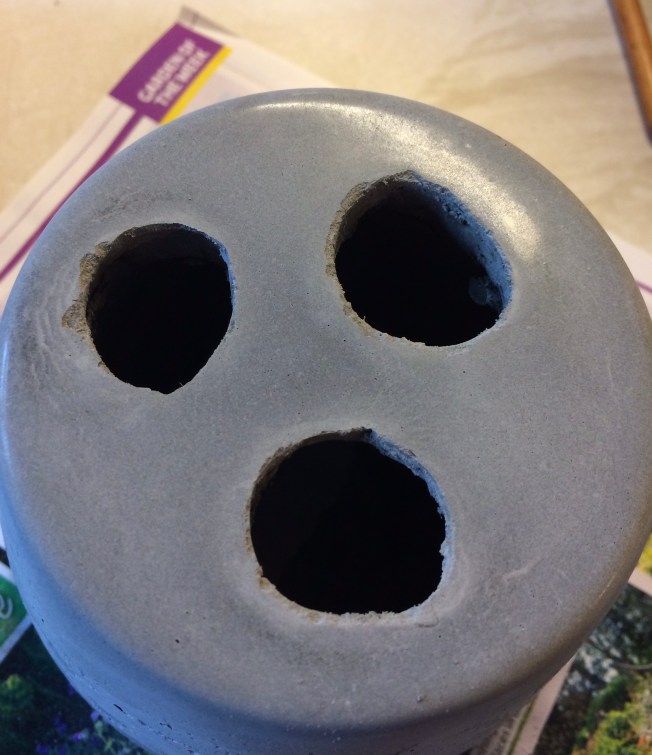
I used these to make the holes in the sides. A very dull scalpel (an X-Acto blade would also work, in the same rounded shape) to start the hole. A not-too-pointy pocket knife that we don’t care about to do most of the hole drilling. I did have to sharpen it five times. Lastly a crappy battery powered drill that had no charge and likely had the wrong drill bit on it.
I made a bunch o holes! When it was working well, it took me about 5 minutes per hole.

Overexposed. But by now the cats were waking up from their 3-hour nap and wanted to see what I was doing.

Not too shabby!
 Immediately planted up one of my unhappy orchids. Lots of root rot and suffocating moss in the original plastic pot. I even poked some of the roots out of the holes for stability. Let’s hope they like their new homes.


